Showing posts with label gifts. Show all posts

Dec 1, 2014

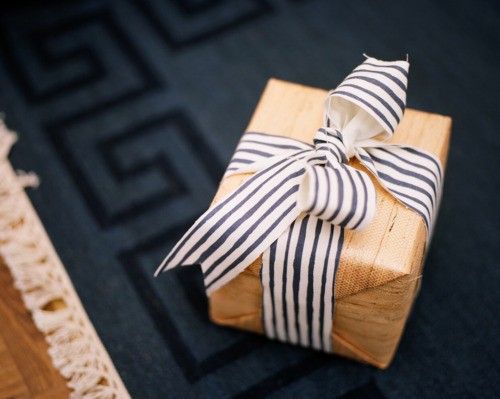
gift wrapping inspiration in blue + white

i have been busy the last couple of weeks! i was contracted to scheme up a design direction for a fun center...yep, a fin center. the kind with an arcade and party rooms and laser tag and a bowling alley! no worries---there won't be any crazy, psychedelic clown carpeting and primary colors anywhere in the space. i conjured up a muted yet whimsical color scheme, with just enough touches of metal, wood and concrete to make it feel grounded.  if you want a peek at the board that i pulled together, you can see it on my instagram feed!

anyway, the whole project got me thinking a bit "outside MY box". i tend to gravitate to neutral, dark color schemes with lots of texture and simple, classic lines, but i honestly find almost all interior decor styles appealing in their own way. when jennifer at the pink pagoda asked for participants to link up to her blue and white bash, i thought that it would be fun to pull together some inspiration for one of my favorite holiday activities---gift wrapping!


click here for all sources.

in case you need some wrapping inspiration, you can click here, or enjoy these:


to see more blue + white inspiration, head back to the pink pagoda blue + white bash to see what others have posted!

have a great monday,


May 9, 2014

uncommon goods gift ideas

doesn't it seem that as soon as the leaves start budding and the flowers start blooming that there is an avalanche of birthdays, holidays (ahem, ahem, mothers DAY?) and weddings that require a thoughtful gift?  sure, gift cards can be nice, but for good friends i always like to put a little more thought into a present. one place that i often turn to for unique gifts is uncommon goods. i have used many or their quirky and whimsical clocks (one of may favorites is here) and accessories in my room designs, and they also have a tremendous selection of jewelry and art, as well as gifts for the garden, office, pet, entertaining and even games!

here are a few picks that are sure to please those wonderful women in your lives!


1 /  2  /  3  /  4  /  5  /  6  /  7  / 8  /  9


be sure to check out uncommon goods for more gift ideas for all those ALL special people (and pets) on your list that require a thoughtful and unique gift.

happy shopping!
this post was sponsored by uncommon goods

Dec 19, 2012

even more DIY felt gift adornments

i love that felt is easy to find, affordable, and can be used to make very fun and creative gift adornments!
in case you missed my first two posts about felt gift adornments, you can read them here and here.

here are two more ways to dress up gifts with some felt, ribbon, and a handy-dandy glue gun!

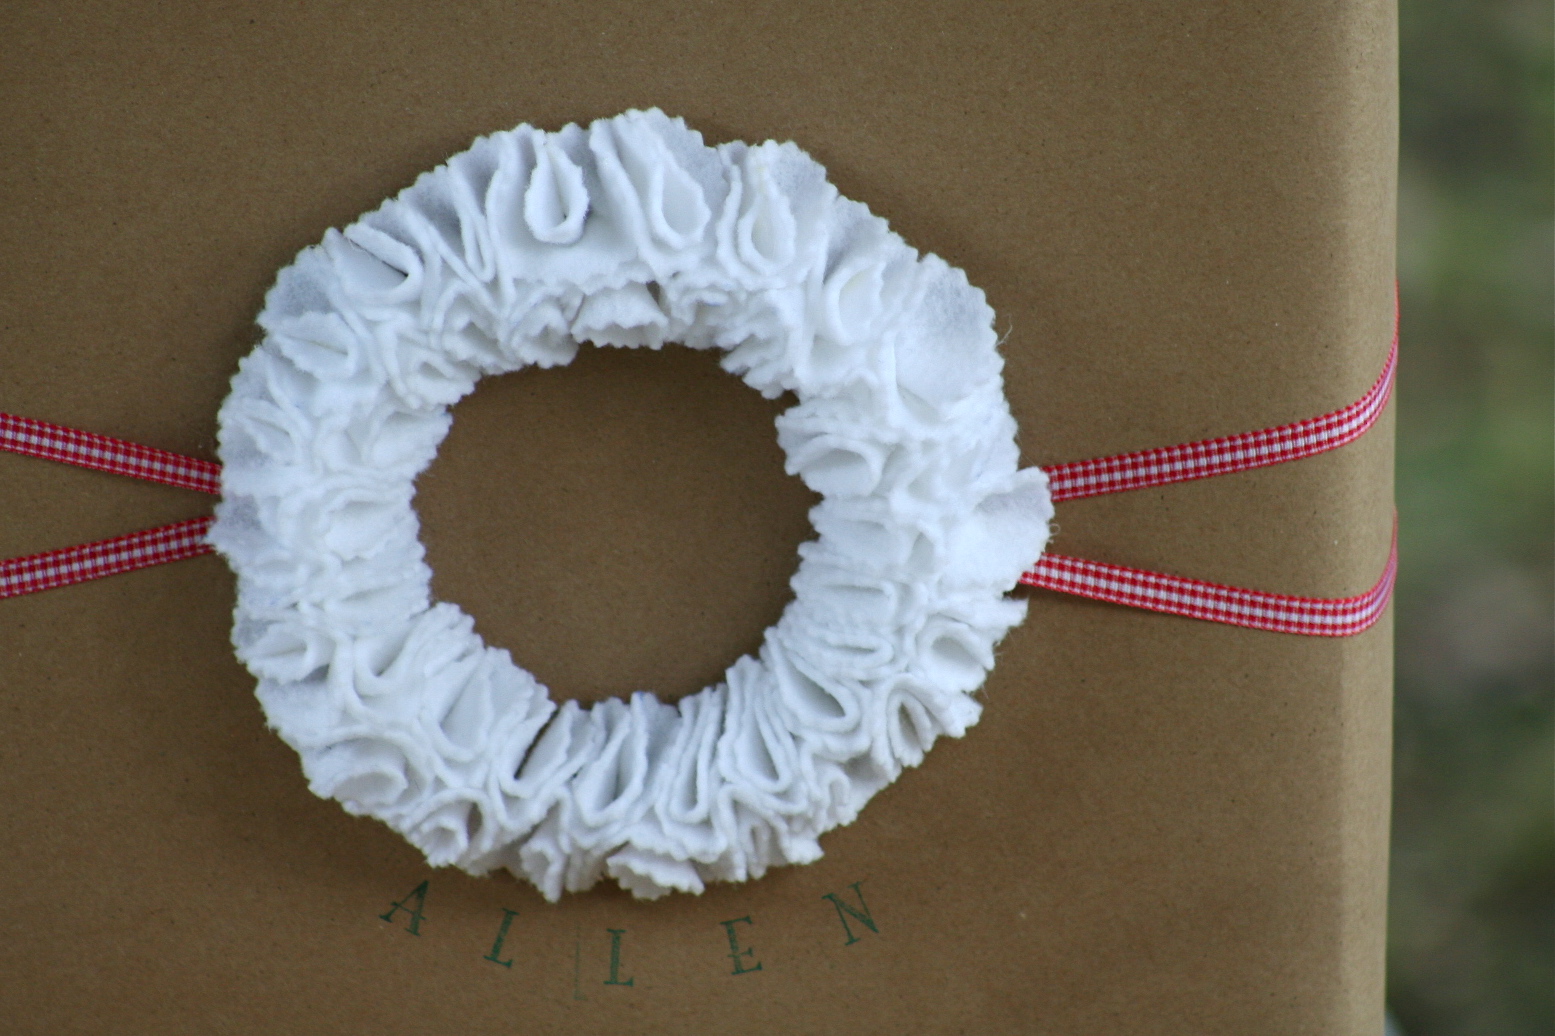
felt wreath:

 this wreath is incredibly easy to make and can be used again and again!
i used 2 sheets of felt, a simple form cut from cardboard, a glue gun, some ribbon and letter stamps.
i cut the felt circles with pinking shears, and folded them in quarters and glued them (see directions here) to my simple cardboard frame. i marked dashed lines where i didn't want any glue, to make it easier to lace the ribbon through.


after the wreath was complete, i laced ribbon through it, tied it to the box, and stamped the name directly on the wrapping paper.

circle felt garland:
this is another fun simple gift garland to make.
you will need some felt circles in 3 sizes, ribbon, a glue gun and some batting.


just put the larger circle down, place the ribbon on top, along with a tiny amount of batting. put a thin bead of glue on your smaller circle, and place on top of the batting. you don't have to use the batting, but i think it gives a fun 3D texture to the garland.


these are both so easy and easy, and can be used over again.
my other posts on felt gift adornments are some of my most popular posts!
read them here and here.

happy wrapping!

Dec 16, 2012

easy, affordable gift wrapping ideas

i actually shared some of these ideas last year, but i posted them too late to really USE...so, i thought i would be nice and repost them, along with a few new ideas.

 a page from a coloring book + a kraft paper tag with a large initial + colored twine.
 i got my twine at ikea, the coloring book from the dollar store, and cut the tag and initial out of card stock with my cricut. if you don't have a cricut, you can always print out a letter and cut around it.

 twine + initial + sprig of fresh greenery.
i used the cricut to cut the initial, and the twine is some that i have had in my craft box for years. the greenery is from my backyard.

large tag + buttons to make a snowman + stamp
i cut a simple tag out of car stock, and attached the buttons with glue dots.

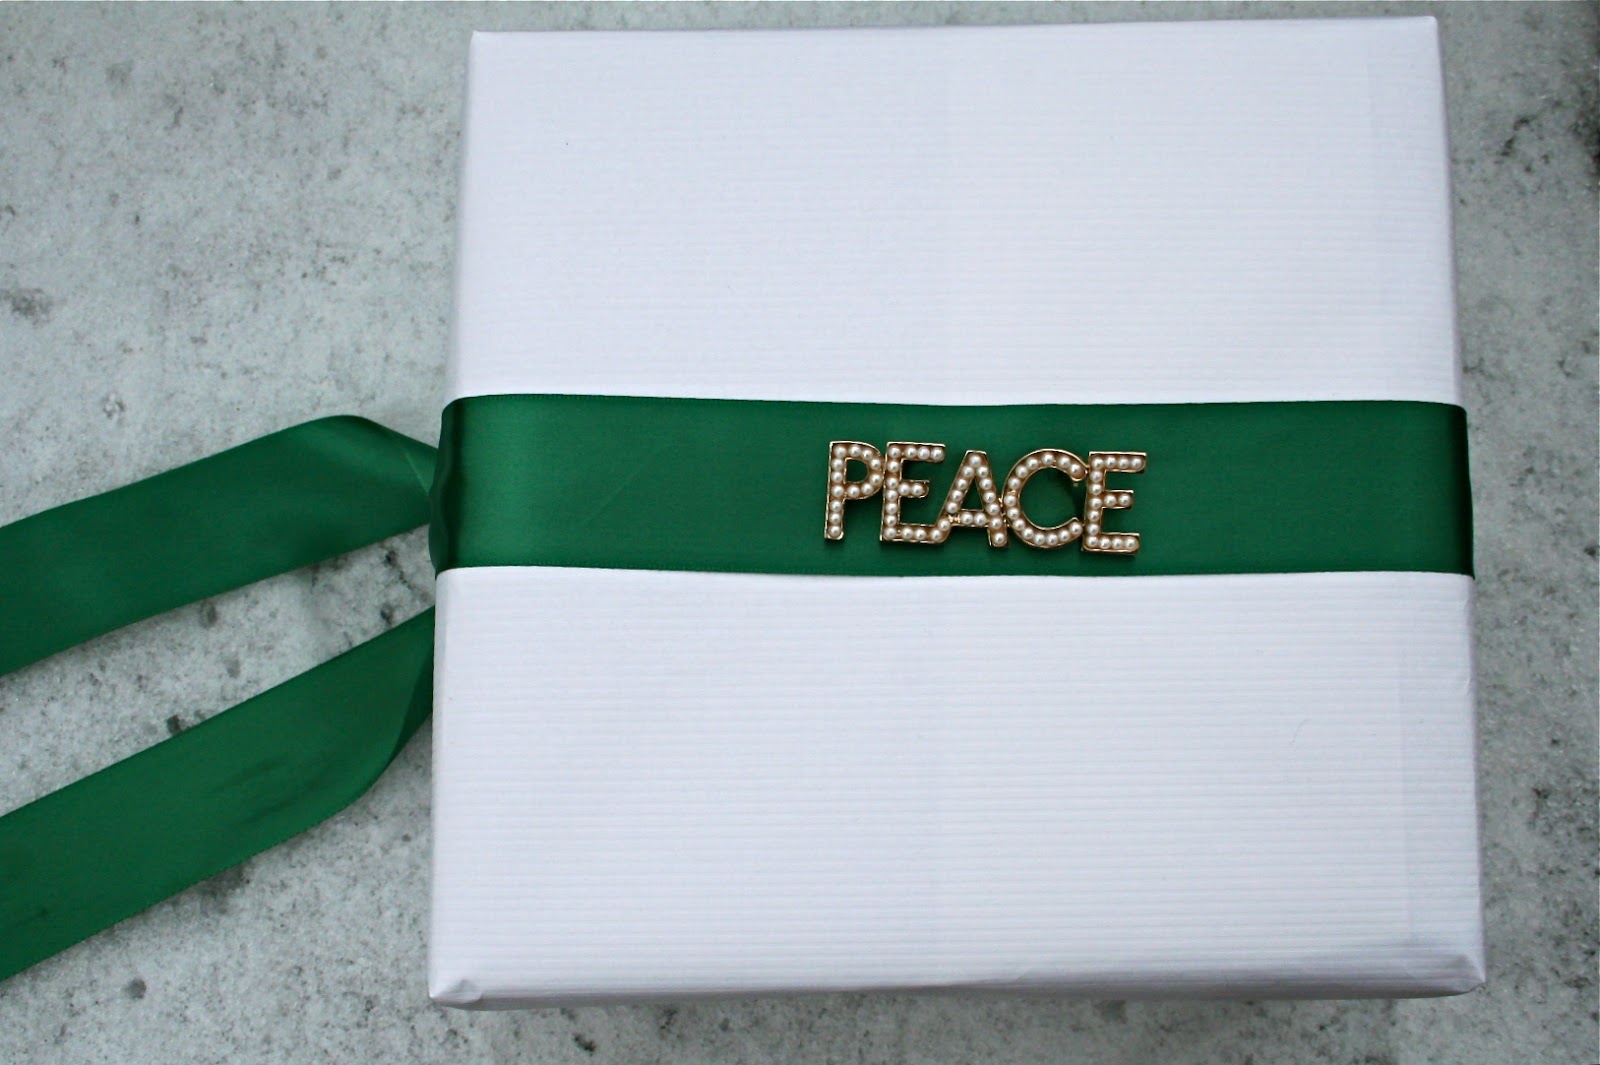
 ribbon + holiday broach/pin
the broach can be used as part of the gift!

dollar store headband + craft pick.
this sequined headband came in a 3-pack at the dollar store. i added the feather craft pick and wrapped the gift in some crocodile wrapping paper.

 ribbon + wooden tag + patterned ribbon on dollar store box.
i removed the cheap looking ribbon from the dollar store box, cut a strip from some chevron ribbon and glued it to a wooden tag and tied it to the box with some coordinating ribbon.

Dec 23, 2011

last minute wrapping ideas

i know, i know.
this post would have been a LOT more helpful last week. or two weeks ago.
unfortunately, i am not one of those people that has everything ready for every holiday weeks and weeks in advance. (and if you are one of those people, and you need something to keep you busy today, come over to my house and i will put you to work!)

as i was wrapping a few gifts yesterday, i thought i would take a few pictures to
share some inexpensive and easy last minute ideas for wrapping all of those christmas gifts.

these are the gifts that my kiddos gave to their friends. they are king size candy bars that i wrapped with pages from a coloring book. the twine is from ikea. i used my cricut to cut out the tags and the letters, but if you don't have one, you can just trace an existing tag, and use a marker to write the initial.

 
this is another really inexpensive way to wrap a gift...
again, if you want a nice, crisp letter and you don't have a cricut (or other cutting machine) you can print the letters you need on your printer and cut them out.

this is a great way to wrap a gift without using a lot of ribbon.


and finally, who doesn't have a bunch of buttons lurking somewhere in their house?
just stack three buttons to make a snowman. alternate the top button to make him look like he has eyes.
this look would be especially fun if the buttons were different colors.

happy wrapping!

Dec 13, 2011

wrap it up

one of the things i love most about the holidays is seeing beautifully wrapped presents. it doesn't matter if its in a magazine, on tv, or one that i receive or give away... my heart always skips a beat when i see a thoughtfully and artfully wrapped gift.

here are some of my favorites, which all happen to be insanely cheap to do....
these lettered tags would be so easy to make with a cricut or other craft cutter. 


tis gift looks so pretty wrapped in fabric and tied with lace. this is a great way to use up and fabric scraps you may have lying around.

i really like the simplicity of the striped ribbon and grasscloth together....and this is another great way to use up wallpaper samples or pieces left over from a project.


aren't these darling? little pinwheels on colored boxes...would be perfect in christmas colors!

ah....martha would be proud! i love how the colors on the paint chip garland look 
against the the kraft paper. this is another really affordable technique.

 this wrapping is perfect for a gift that will be mailed. no fancy bows to crush!


the tutorial for these wax paper flowers is online. i love how it looks paired with the leaves.


and, a no-fail/always great look is to adorn your gift with some fresh greenery. not only does this add a touch of color and fragrance to any gift, it's also free!


this is how i wrapped the gifts for my nieces and nephews last year...it was perfect, since they all needed to be shipped.

if you are looking for more ideas, several of my wrapping ideas have been featured in
 an HGTV gift wrapping slideshow you can see here.

one of my sponsors, apothica, is doing a 12 days of christmas giveaway on their Facebook page...to check it out, click here.

Dec 10, 2010

more easy felt gift adornments-tutorial

some more, 
easy felt gift adornments...
(the first post is here, i case you missed it.)
two-tone roses...
and a cute and easy flower.
for the felt roses:
you will need:
felt 
(i used two shades of brown for the 
roses and some green for the leaves and strip)
scissors
marker
something round to trace
adhesive 
(i used hot glue)
twine

stack you two shades of felt, 
and take a marker and trace a round object onto the
top layer of felt. cut through both layers so that 
you have two circles.
starting at the edge, cut a spiral in each circle.
using your adhesive, secure the center of the rose and 
start wrapping, glueing as you you.
i started my darker felt first, then trimmed about 
1/2 inch of the lighter felt, and added it to the
darker felt after a few turns.
once you are all done. attach your leaves.
i glued all three of my roses onto a piece of felt,
and attached a hair clip and pin to the back
so that i could re-use it.
this is a great way to give another gift within a gift...
not only does it make your package look pretty, 
but it can be reused after the package is opened!
i think it looks adorable on this jacket, 
and my 9 year old daughter is super excited to 
wear it in her hair.
 for this package, i also cut a strip from the green felt, 
and secured it to the box with green twine.
easy, and so cheap!
and the whole thing only took about 20 minutes to make.
****
and now, onto the felt flowers...
you will need:
8 small felt circles
1 larger circle
(i just used the top and bottom of a glass)
a rectangular strip of fabric for the bottom.
(there are a ton of wayt to do the bottom...
on the first package, i
knew i wanted to use a wide ribbon, 
so i made two parallel cuts as shown above)
fold your small circles in fourths,
and glue them to the larger circle.
i found it helpful to do this symmetrically...
kinda of like pie slices. or a clock.
i placed the first circle at 12 o'clock, 
the next at 3, the next at 6 and then 9.
then i tucked the remaining circles in between 
the ones that were already placed.
then i glued the strip on the back,
making sure not to glue down the middle.
then, i threaded my ribbon through and 
attached it to the gift box.
for this one, 
i also covered the top of the box with felt.
i like the simple look of this one as well. 
the twine and the cream felt are timeless.
and, when you are done making a gift look fabulous, 
you can take off the flower and add it to a headband!
these felt gift adornments really are
 the perfect two-for-one gift.
 happy wrapping friends!