Showing posts with label master bathroom. Show all posts

Jan 17, 2015

one vintage nude, one minted.com abstract (art for the master bathroom)

adding the final touches on a bathroom is a bit liberating. all of the "hard stuff" has already been decided...vanity style, floor tile, shower tile, wall tile, plumbing fixtures, sinks, toilet, lighting.
it's already in place!
there aren't all THAT many decisions left to be made.

my master bathroom has a lot of marble in it. marble on the counters, marble on the floors, and marble on the walls around the shower and tub. that much marble has a certain coolness to it---both  visual and literal! i want to use some art work in here to add some warmth to the room. (i am thinking soft gold frames might be nice!)

i already have a vintage nude lithograph that i will frame and hang...
(you can read more about that here)

 i will also be looking to add another piece from minted.com. i became more aware of minted during the last round of the one room challenge, because they were one of the sponsors for the featured designers. i was floored by the selection and quality of the prints available! they not only have an incredible selection of art,  but they also carry fabric! (who knew, right? their fabric selection is like a pared down, curated selection of what is available at spoonflower.... without the weird jellybean, gargoyle, or cactus fabric to filter though!) minted also now carries save the date cards and supplies for your next party. GOOD stuff.

i spent some time on their site, considering options for my master bathroom. i want to keep everything neutral...there are so many textures in the room, and i want to keep everything monochromatic so that it feels more cohesive.

 i could stick with the nude theme and get this one:


or this one:


love the repetition and simplicity of this one:


the boldness of this one would stand up against the wallpaper:


but i also love a moody landscape, and this one is deliciously moody:


so many pretty choices! i may just have to get two...


this post was sponsored by minted.com

Jan 15, 2015

first look at my unfinished master bathroom

how about a little tour of my master bathroom? i haven't posted many pictures of this room ...well, because it's not DONE. yet. we already have a few projects scheduled for completion, and are hoping to have the room finished soon. 

this is the view looking into the master bathroom from the master bedroom:


the two doors on either side of the vanity are his/her closets. the two small doors straight ahead belong to a linen closet, and the door to the left is the american standard toilet.

overall, the bathroom is a dream! the bathroom functions wonderfully for us. 


i love the freestanding tub, walnut vanity, carrara marble herringbone floors, patterned marble/slate shower floors and large window.


some might criticize the fact that we only have a single sink in the vanity, but we have had 2 sinks in many previous homes, and found that we actually prefer more counter space over 2 sinks. 


on the TO DO list:
install shower walls and doors
*yah. its been a little DRAFTY taking showers in here for the last 18+ months!

install vanity mirror
this mirror will be a two way mirror, to allow the tv to be seen though the glass.
i can't wait to have a bigger mirror!! not only will it reflect more light into the room from the window, but it will also make getting ready a TAD bit easier.

install mirrors on linen closet doors
we knew we wanted these doors to be covered with mirrors when we built the house, so we specified smooth slab doors here. 

add crown moulding

paint walls

install light fixture (over the tub)
add some softness with a window treatment
hang art
hang towel hooks/rings

hang THIS wallpaper in the toilet closet
(cole & son lily wallpaper in black/bronze)
i fell in love the very first time i saw this wallpaper! its been sitting in my drawer for over a year now, and i am dying to get it hung! i will most likely hire someone to hang it for me...apparently, it needs to have liner paper hung first....not something i am excited about possibly messing up.


the shower doors and mirrors will go in this weekend, and the vanity mirror, sometime next week. i am just starting to consider fabric for the windows...right now, i am leaning towards a simple gray linen panel. depending on how quickly i can make decisions, this room should be pretty close to DONE in the next 4-5 weeks!


the design board i created for the bath:


and read more about the progress here and here and here and here.


Feb 26, 2014

design plan: master bath remodel

i wanted to share with you the design plan for a master bath remodel that i worked on with a repeat e-design client.  this client wanted a warm, updated bathroom with touches of wood and whispers of pattern.
here is the design plan for the space:


do you have a room in your home that needs some improvement?
send me an email, and lets work together!
autumnclemons@yahoo.com


Oct 9, 2013

a tour of my closet

a look at my finished (for now) closet!
the total cost to build the entire shelving and storage that you see was $300!
you can see a post on the planning and building here. 
the cost to stencil and "decorate" the closet was also really low, since i had everything on hand.
the only thing i bought NEW was the stencil! you can see a post on how i stenciled the walls here.


i layered an ornate thrifted mirror (purchased for $3) on top of my existing rectangular mirror with command strips.

the vintage drawer pulls were added to the ikea malm dresser to dress it up.

my necklaces hang from key organizers, purchased at walmart.

the mirrored tray and preserved cypress topiary were both tj maxx finds.


images by sara boulter.

sources:
wall color: benjamin moore winds breath
stencil color: custom mixed from ben moore samples
stencil: stencil boss
dresser: ikea malm
hangers: bed bath and beyond
leopard jewelry organizers: tj maxx
baskets: pier 1
belt rack: ikea
necklace holder: key organizers, walmart
rectangular mirror: home depot (about 10 years ago!)
small mirror: thrifted
drawer pulls: vintage from ebay

Sep 22, 2013

my first stenciling project

all-over stencils are a great way to get a high end wallpaper look at a fraction of the cost of wallpaper. i personally love the way they look, and think they are a smart and budget conscious way to add that extra layer of pattern to a room. since i have been renting for the last 5 years, i haven't tackled a stencil project...until last weekend. i am considering another stencil project for one of my daughters rooms upstairs, but decided to test out my skills in my closet first. boy, and i am glad i did!


after an exhaustive search for the "perfect" stencil, i stumbled onto a site called stencil boss and ended up purchasing this one, called the "ada morocco" stencil.  this shop has a great selection, including many stencils that i have never seen before.
 i wanted something that was feminine without being frilly, and i loved the balance of geometric shapes and softness of this particular stencil.


i wanted the paint to be a soft gray, and also have some shimmer to it, so i added some gold craft paint to a few gray samples that i had around the house. by the way, the gold paint did absolutely NOTHING to the color. nada. zip. i looked into buying a metallic glaze from lowes, but it was nearly $14 and i decided i would see if the craft paint would give me that slight pearlescent look that i was after. the soft gray was nice, but there was NO metallic sheen to be seen....so, if you want that soft, shimmery look, you may want to NOT be a cheapskate and get the metallic glaze!


anyway, onto the stenciling---
what i thought would take 3 hours took NINE.
yes, nine.
and by the end, i was pretty exhausted and feeling very impressed with all of those other people out in blogland that have attempted this project.
now keep in mind that i was stenciling around all of the closet built-ins and shelving, which make the task quite a bit more difficult than it would have been on a flat wall....but still--it was not easy!


about half way through the project, i had to stop and wash off the stencil, which took nearly 45 minutes, and made a mess out of my kids tub. i was not prepared for how long it would take to get the paint off of the stencil, but really impressed with how well it held up to my scrubbing!


after the major work was done, i realized that i still needed to get the corners!
ei--yi--yi!
it was already 10 pm at this point, and i was getting grumpy.


instead of cutting or bending the stencil to get into the corners, i decided to tape them off and paint a charcoal band around the ceiling, at the corners of the walls and around the closets shelving.


all in all, i am reasonably happy with the way it came out.
would i RATHER have a great thibaut or schumacher wallpaper in there?
yeah. probably.
and maybe one day i will cover up my masterpiece with something that i fall in love with, but for now, i love the dimension and personality that the stencil adds! it makes it fun to get dressed every morning, and adds the perfect feminine touch to a space than many of us neglect to decorate.


(another  weird panoramic iphone picture. it was midnight and i guess i was having trouble keeping my hand straight!)

i will have some great finished pictures of this space coming later in the week, so stop back by!


what about you? 
have you tried an all-over stencil project in your house?
any tips for me, since i will most likely still attempt another stencil in my daughters room?


Jun 4, 2013

freestanding tubs (and the one i picked for my house!)

the size and style of our bathtub was one of the first "finishing" details that we selected for our house. we had to know exactly how much space we needed for the tub during framing, and soon after, we needed to know---down to the inch-- where the tub would sit so we could get the plumbing in the right spot.

i have never had a freestanding tub in any house that we have lived in, but i knew for this house i wanted something a little more modern and simple than we had previously had.

here are a few of the images that fueled my obsession with freestanding tubs:

who didn't fall in love with keri russells home when it was featured in elle decor?
this bathroom is downright gorgeous.


the textures in this coastal bathroom are perfection, as well as  the elegant silver leafed bathtub.

here is a similar bathtub in another bathroom. i like how these tubs are a modern take on an old fashioned clawfoot tub.

the lines of this tub are a perfect balance between modern and traditional.


i fell hard for this tub, but it was way out of my budget.

 i also really liked the simplicity of this tub.

the price for free standing tubs can can give you sticker shock, as most are in the $3,000-$7,000 range.
of course, keep in mind that you will not have to spend money on material and labor to build a deck around a freestanding tub. that can save you hundreds and hundreds of dollars.
but still...
3k-7k was NOT in my budget, so i did some digging.

while i was narrowing down my selection, i visited a local plumbing showroom and asked if they had any freestanding tubs under $2,000. the sales person i was talking with literally snickered.
hmmm. not a good sign.
(save me internet!)

we finally settled on a very simple and affordable tub that fit the dimensions of the opening that we wanted for the tub.


we bought the laura 59" long tub from the wyndham collection. they also have a larger version of this tub, but we decided to make our shower larger, and therefor needed a smaller tub. i really like the simple lines of this tub, and felt it was a very transitional shape---it felt modern enough, but not too modern. it is acrylic (versus cast iron or ceramic), which makes it less expensive and also a WHOLE lot easier to lift.


there are a LOT of places online that carry this tub, but we ended up purchasing it from build.com.
i called several other online retailers, and the people at build.com had the best price and the best customer service ratings, so i went with them. of course, when i went to order it, we had less than 2 weeks before we were supposed to move in, and the tub was on back order.

 it took about 5 weeks to arrive, and then we had to schedule the plumbers to come out to install it, which took another week.

we place the tub where we wanted it, and then a hole was drilled to feed the drain through.


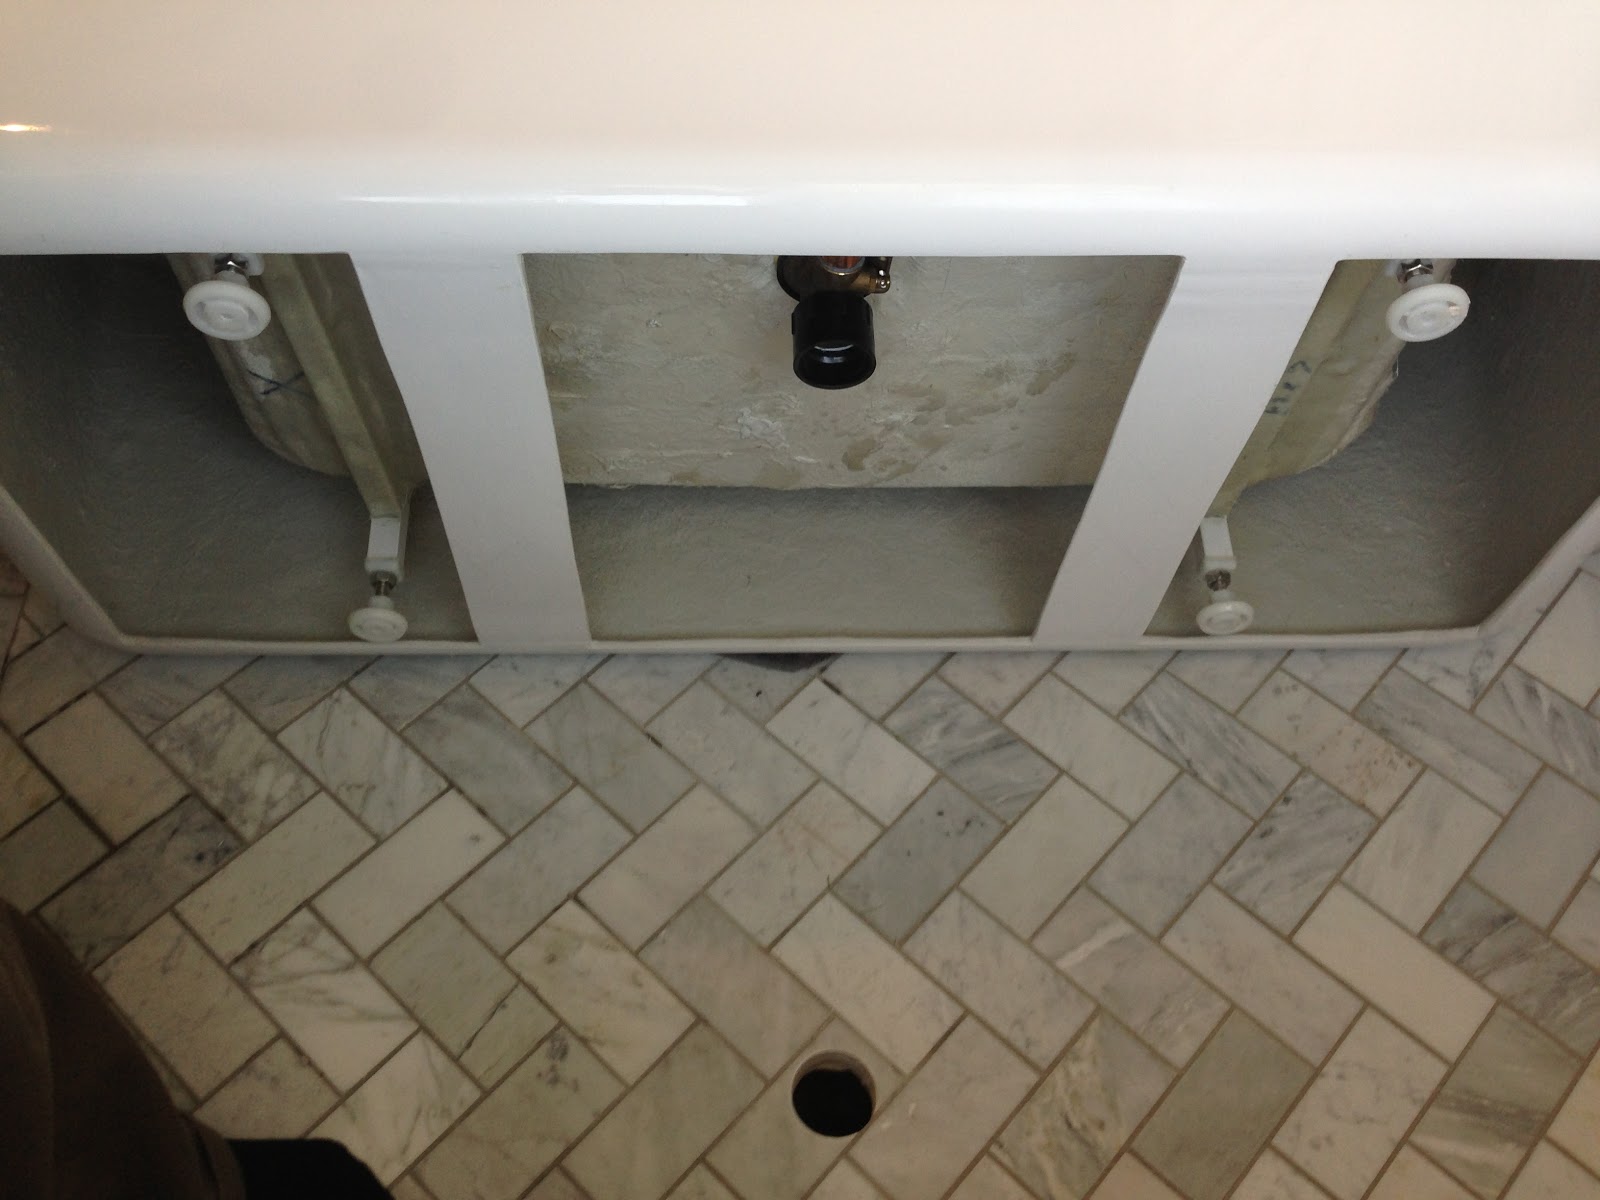
here is a look at the underside of the tub.
as you can see, it has adjustable feet that allow the tub to be leveled once in place.


and here it is! all ready to be filled.
i am really happy with the way it looks...it is smaller than other tubs we have had in the past, but 
i love the simplicity of it. i haven't been able to use it yet---we still need to get some expanding spray foam around where the drain meets the floor, which will hopefully happen soon! i wanna test this baby out!