Apr 15, 2013

construction progress: week 23

this is what has been happening at my new house during the last week:

the tile in the girls shower was installed. i chose a 4 x 16 tile for their shower, to contrast with the smaller tile on the floor. 

here it is installed, with the bull nose trim on the sides, and the tile completed around the window.

once the walls were finished, both the walls and the floors were grouted a warm, taupey color.

 the tile in the master bathroom was completed.

we decided to wrap the tile on the wall around the tub. it wasn't that much more expensive, and it looks amazing! 


the floors in the master, as well as the other upstairs bathroom were all grouted.
i couldn't get a good picture of the upstairs bathroom because there are no windows, and no light in the room.

a better look at the master bathroom. the herringbone is bordered straight tiles, and there are wider tiles where the spaces transition into the other spaces.

the master vanity was set in place. it is so nice to see that touch of walnut! it really adds a nice warmth to the bathroom.
the drawers, and counter tops will be installed soon.

 we picked up the stair treads at home depot.

 ahhh! stairs in the garage! 
after walking into the house on dirty, temporary 2x4 treads, for the last several months, this is a big deal!

 on the outside of the house:
 the concrete was poured to form the front steps.


more progress was made on the retaining wall in the front of the house.

there is still a LOOOOOOONG way to go on the retaining wall in the back.
ugh. looking at this makes me cringe. there is so much work that needs to happen back here!
my husband and a few of his very amazing friends are tackling this project, and all i have to say is that they are amazing for helping us out!

and back to the inside....
a handrail for the garage steps was also installed.

 and work was started on the stairs. we originally planned on carpeting the stairs, because it was going to  cost too much to buy "nice" wood and finish them, but our installer did such a nice job with the pine and poplar, that we decided to go ahead and paint them. the landing will still be carpeted, and we will add a runner eventually, but for now, the risers will be white and the treads will be black.


 we selected simple, square balusters and maple handrails (since they were the least expensive.)
the balusters will be painted white and the handrails will be painted black.

we also opted for a simple, square newel post.
it will also be painted white.


 it is amazing how having real stairs makes the house feel so "finished".
and safe.
i don't have to worry about my kids falling down the stairs every 5 seconds!


 and, as always, there was cleaning to do!

 for a brief moment, right before the painters arrived, the house looked like this!
ahhh! so clean. 
but it didn't last!

 the finished stairs.

the view from the kitchen island.

it's really coming along!
next up:
paint.

then, the electricians will be back, the countertops will be installed, and the plumbers will come back and set all of the faucets and toilets. and more cleaning. after that? carpet and finishing the hardwood! and of course, cleaning and then MOVING.
it's really starting to feel real!

 oh, and just a heads up---i had to change the settings on the comment section. i was a LOT of spam comments. like 20 a day! so, to ward them off, i have temporarily changed the comments settings. i know it is annoying, but i will remove it in a few weeks.


Apr 10, 2013

first look-master bathroom shower floor

the tile installers just finished laying the patterned tile on the shower floor in the master bedroom.
it is every bit as gorgeous as i imagined it would be!
 (i seriously didn't want to leave the house yesterday evening! i kept walking into the bathroom and fawning over this floor.)

the 3 x 6 tiles were purchased at home depot, and the black squares were cut from the larger tiles of  slate that is also in my sons bathroom upstairs and in the laundry room.
i love how the pattern references the herringbone that is laid on the rest of the floor, but the black accents really add some drama and fun!
this is not a pattern that i see very often, but it is really easy to pull of with only two sizes of tile and simple cuts. a lot of the patterns that i was considering had lots of angled and mitered cuts, and were really complex. i think the "design payoff" of this pattern is hard to beat! (simple + easy yet bold + sophisticated)


what do y'all think??
i absolutely love it!

 check out Bathroom 365 for a great selection of all you bathroom remodeling needs!

Apr 9, 2013

sink snob

i never gave much thought to sinks.
maybe that's odd, considering my line of work, but i always thought sinks were one of those details that didn't matter a TON. especially if you are opting for a "normal" under mount sink and not a vessel or apron front sink.

well, after spending some time with janessa at chariot wholesale (a sink, faucet and tub wholesaler here in salt lake), i got SCHOOLED in all things SINK.
and now, i think i just might be...a sink snob. and you might be too, after reading this post!

one of the things i love about my job is that i get to learn something everyday...and one of the things i love about blogging is getting to share that knowledge! lucky you! hee. hee.


the first thing i learned is that sinks are rated by their thickness, also called "gauge"
the gauge of a sink is generally between 15 and 22.
the lower the number, the thicker the metal.

most sinks available for purchase at home improvement stores have a gauge between 20-22.
most sinks in commercial kitchens have a gauge between 15 and 18.
so why do you want a higher gauge (thicker) sink?


*durability
thicker metal sinks mean that the sink is less likely to dent or bow.


*sound control
most quality sinks, or sinks that have a lower gauge are really quiet. they don't make that hollow, tinny sound when items are dropped in them. better quality sinks also have superior undercoatings which helps to absorb sound. (i actually didn't realize that sinks even HAD undercoatings on them until i went sink shopping at chariot)

*a word about undercoatings:
not only do they help absorb sound, but they also protect against condensation and help maintain sink water temperature. good stuff!


what else should you look for in a stainless steel kitchen sink?

*optimum combination of chromium and nickel
stainless sinks are usually labeled with the amount of chromium and nickel contained in the steel. there are combinations of chromium and nickel that allow for superior corrosion resistance and durability. an optimal ratio of these two metals allows the sink to "gives" a little, reducing the chance of dish breakage. the ratio is usually something like "18:8" or equivalent. this means there is 18% chromium and 8% nickel in the stainless steel. the higher the percentage of these alloys that are present, the better the grade of stainless steel. (so, a "20:10" ratio is better than an "18:8" ratio.)


what else should you consider?

bowl depth, taper and radius are the three basic sink measurements. 
depth is the distance from the top of the rim to the bottom of the sink next to the drain. 
the bowl taper is the slope on each side of the sink from rim to bottom. 
radius is the measure of the bowl's corners and bottoms where the sides and bottom meet. 

the point to remember from all of this is: the deeper the bowl, the straighter the slope, the smaller the radius, the more useful the sink capacity.

you should also consider the type if sink that you want...single bowl? double? what type of edge and bowl shape do you want?

so, what did i end up buying?
for the kitchen, i opted for the versailles edge culinary style single bowl 15 gauge sink.
(i totally felt like ralphie from a christmas story when i just wrote that!)

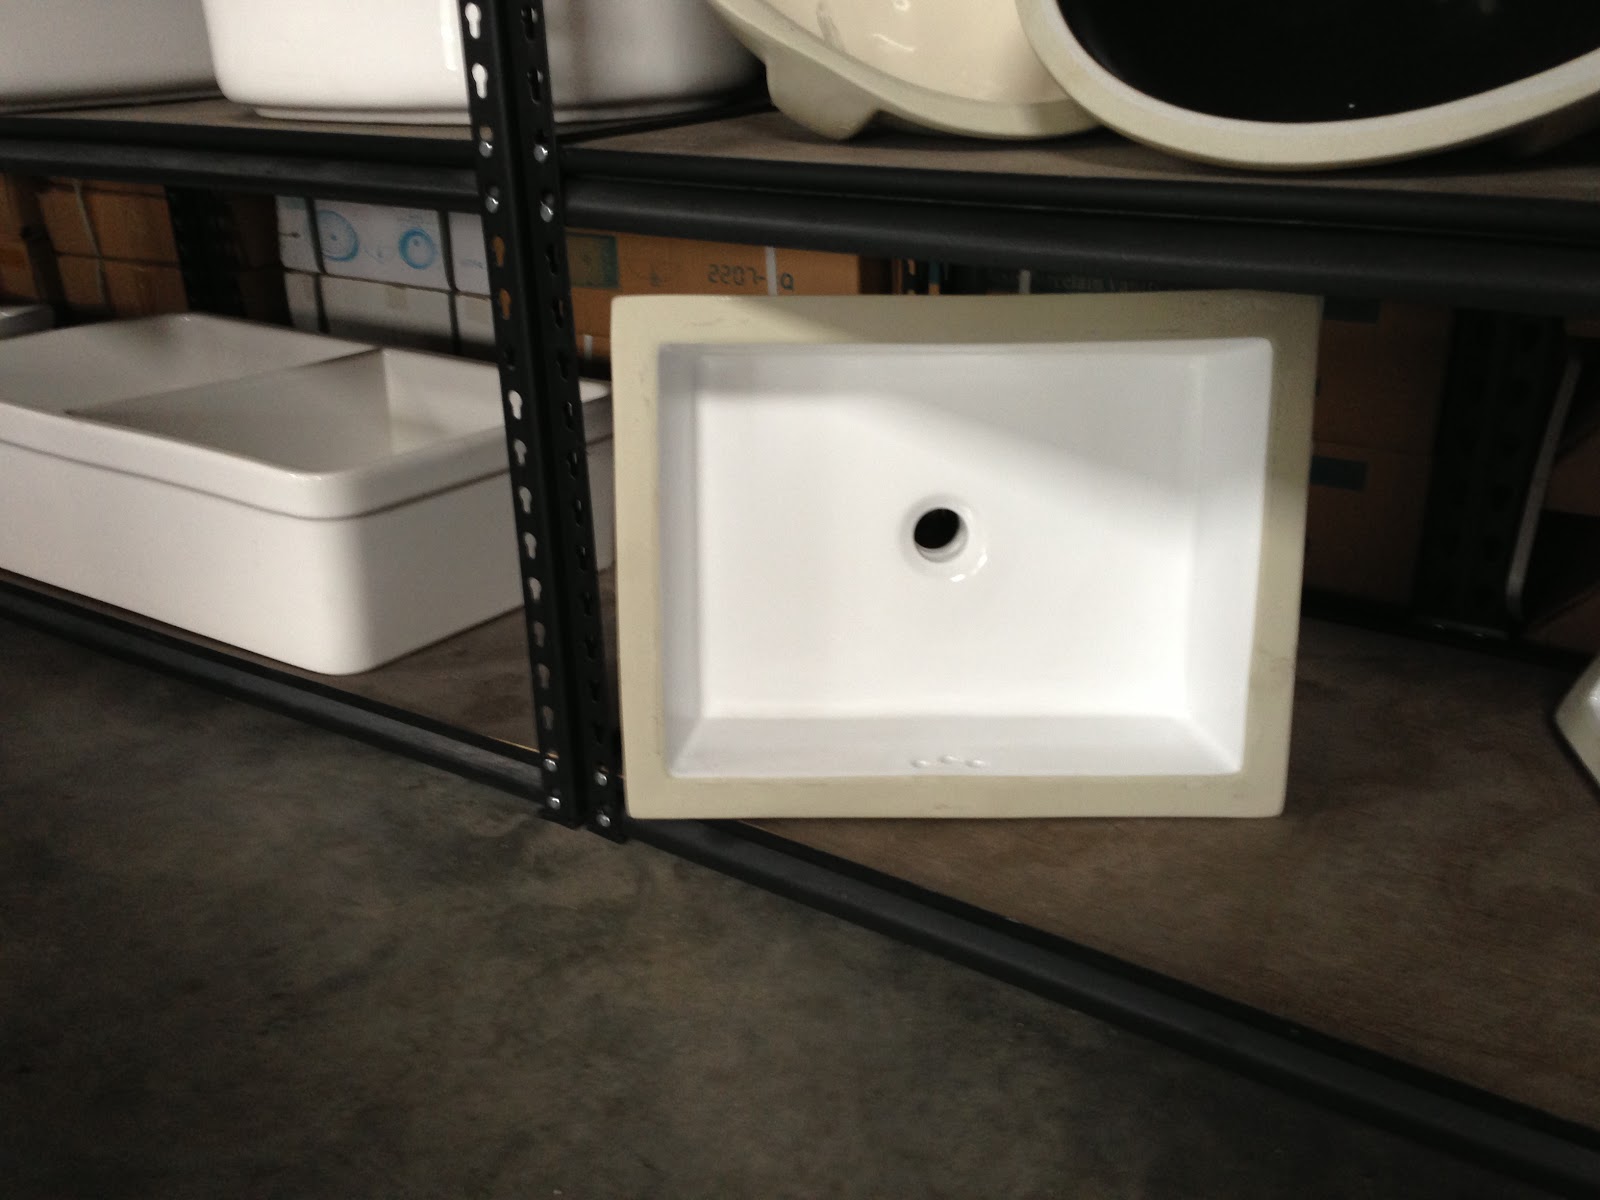
here it is again, in the showroom:

and for the bathrooms, i chose a white, square porcelain sink:


it is called the "tideway"  and is similar to the kohler K-2297-0
cant wait to see them installed!

Apr 8, 2013

hardware for the island

sorry for the lack of posting last week. it was our spring break, which means my kids were home all week, and things (of course) were busy with the new house. we decided to start packing and cleaning our rental house as well...hey, free child labor, right? gotta take advantage of THAT! my kids were not so thrilled. we didn't spend every second working of course...i made sure that we had a little adventure every day so that it still felt a little like spring break!

believe it or not, i have STILL not made all of the decisions that i need to for the house.
i still have not selected the hardware for the kitchen cabinets.
i know, i know!
nothing like waiting until the last minute! (my contractor/husband is being very patient with me!)
however, i HAVE decided on the hardware for the kitchen island. i feel in love with this image:

i think what i love about it is the mixing of all the metal tones...the hardware is brass, the faucet is chrome, the light fixture is black/dark bronze, and the sconce by the fireplace is vintage gold.
i know some people think that mixing metals is bad, but i think that brass and chrome is the new peanut butter and jelly!
mix away, i say!

in my new kitchen, i will be mixing metal tones.
my faucet will be chrome.
the light fixtures in the kitchen will be a combination of black and brass. (i am going to wait to purchase most of the kitchen and dining fixtures until after we move in. i know what i want, i just cant afford them right now!)
and for the island, i decided on some pretty antique brass campaign pulls from ansaldi & sons.


even though the sides and back of the island are striped with wire brushed oak and RH slate:


the front of the island (that will house the sink, dishwasher and microwave) will be solid RH slate.
here is a picture of them next to a quarter, so you can get a better idea of the scale:

things are starting to move quickly! i have some great update pictures that i will be sharing soon, as well as some more decisions and selections!


Apr 2, 2013

construction progress: week 21 + 22

here's what's been happening over the last 2 weeks at my new house:

i finalized the order for the shower tile in the girls bathroom. i was considering using a smaller tile, like a 3 x 6 or the one i decided to use in my sons bathroom, which is a mosaic 1 x 2 subway tile, but i thought that the smaller tile on the floor needed the contrast of a larger tile on the shower walls.
 the tile i chose is 4 x 16 white tile from florida tile, available through modern tile.

we installed all the backer board for the tile on the bathroom floors...
 (the girls bath)


(the master bath) 

 (my sons bathroom)

i also narrowed down the tile for the laundry room. 
 since i was using the black slate for my sons bathroom, i decided to order some extra and STRIPE the laundry room floors! (don't worry...i am not going stripe-crazy in the house! just the island and these floors will be striped. OK, i will probably sneak in a few more stripes somewhere, but probably in subtle touches like pillows or paint.)
 i knew i wanted high contrast, which i thought i could get with the same grecian white tile that i am using in the master bathroom...but i wasn't crazy about how it looked with the black.
i stopped by the dal tile showroom, and in their clearance area, i came across some 12 x 12 "chiffon creme" honed marble tiles for $3.25 a SF. how could i pass THAT up? i bought a sample and brought it home....

 and immediately made a call to purchase it! i like the high contrast, and i also love that both materials
are honed, and have a very simple, utilitarian look---but together, they are going to be fantastic!

 the tile started getting installed in the girls bathroom.
the elongated hex tile is totally worth the splurge! the soft whites, greys and neutral tones in the tile are so pretty.

 we installed the base trim and door casings in the rest of the main floor.

 AND, the master bathroom shower tile started.
i wanted a larger tile on the bottom half of the shower in an offset pattern, and the herringbone on the top half. we used the pencil molding to separate the two patterns. both patterns are outlined on the sides with a 6 x 12 band. can you imagine what the herringbone would have looked like if the pattern met in the corners? it would have been pretty BUSY looking. the banding frames the pattern beautifully.

we opted for a 6 x 6 tile on an angle for the ceiling.
we were initially planning on laying the tile ourselves, but decided to hire it out! a VERY wise choice, i must say. the "green stuff" is a waterproofing compound called "aqua defense" by mapei. our tile installed swears it is amazing stuff.

a detail of the tile.

on the outside....
 the front steps and side walls were formed, and the stone was put on.


the steps will be formed this coming week. we originally wanted to lay flagstone on the steps, but
it was too pricey...plus, when it snows, plain concrete is MUCH easier to shovel than anything else!


and the front retaining wall was started. it will also be covered with the same stone as the rest of the house.


another view of the front retaining wall.


here are the finished side walls at the front entry....they flare out slightly, which makes the entry feel wider and really welcoming.


i decided i wanted another touch of pattern in the master shower, and so i ordered some herringbone
mosaic tile for the back of the niche in the shower...

and here it is installed!
i love the extra little pop of texture!


the slate tile for my sons bathroom was installed, as well as the shower tile...
we laid the 12 x 24 tiles in an offset pattern. the smaller shower tiles were purchased at home depot and are made by dal tile. i am super happy with the mix of scale and color here! the floors will get a lighter grout, and the shower grout will be dark grey.

speaking of grout....
we are using all mapei grout colors.

a look at the almost finished master shower. (i am having that really white tile in the corner replaced. i love the variation in natural stone, but that tile felt out of place to me.)

and----ta-da!!
if you follow me on instagram, you have already seen a peek at these floors.
the 12" wide tiles were ripped in half, so that the stripes are 6" wide.
i am in love! i think i am going to be happier doing laundry while standing on these floors!


and, as always, there was cleaning to do.

LOTS of cleaning.
but i don't mind a bit.
(anything to get in to the house as soon as possible!)