
it is almost mean that i am posting this today,
since father's day was yesterday!
of course, we could also consider it an
extremely generous gesture, as you now have over
51 weeks to gather supplies and
prepare to tackle one of these little projects!
in any case, here are some instructions on how to make the boxes...
let's start with the striped box:

you will need:
a paper mache box
an old mens shirt
a tie
some ribbon
(i bought mine at a thrift store. after trying
this project with a normal width tie, i found that the
proportions look best with a tie that is on the thin side)

you will also need:
adhesive (i used spray mount, tacky glue and a glue stick)
and scissors.

begin by cutting the face fabric (silk) away from the tie.
there are a lot more layers than you think!

carefully cut away all stitches holding the tie together,
being careful not to puncture the silk.
once you have all of the layers removed,

cut the bottom portion of the silk off,
and iron it.

also cut a strip from the bottom of the shirt and iron it.

i took my supplies outside because:
a) it was a gorgeous day, and
b)i knew i would be using spray mount.

lightly spray the top lid of the box with spray mount
(both the inside and the outside)

and start wrapping the silk around the lid.
wrap it like you would a gift,
and trim off any excess.

trace the lid onto a scrap of the shirt,
and cut it just a little smaller to fit inside the lid.
the tacky glue can be used to adhere to edges down.

i lightly sprayed only the outside of the box,
and used a glue stick for most of the bottom.
the excess was trimmed off the top edge,
and a very light strip of tacky glue was applied.


for the wood box, i simply stained it using
stain/poly mix. i bought this at lowes, and it
cost about $4.50.

ta-da!

to give the tie a little more stability,
i traced it onto a thin piece of cardboard,
and cut it just a little bit smaller.

in order to get the cardboard in, you will
have to remove a few of the stitches on the back side of the tie
that hold it all in place. trim the cardboard as you go to get a good fit.

also, you will need to angle the top portion of the
cardboard in order for it to fit inside the
tie once it's been tied.

tie the tie!
if you need a little help, (like i did)
go to you tube and find an instructional video.
once i had the tie on the box, the thin part
was hanging out about 4", so i cut it off,
and tucked it into the back of the tie.
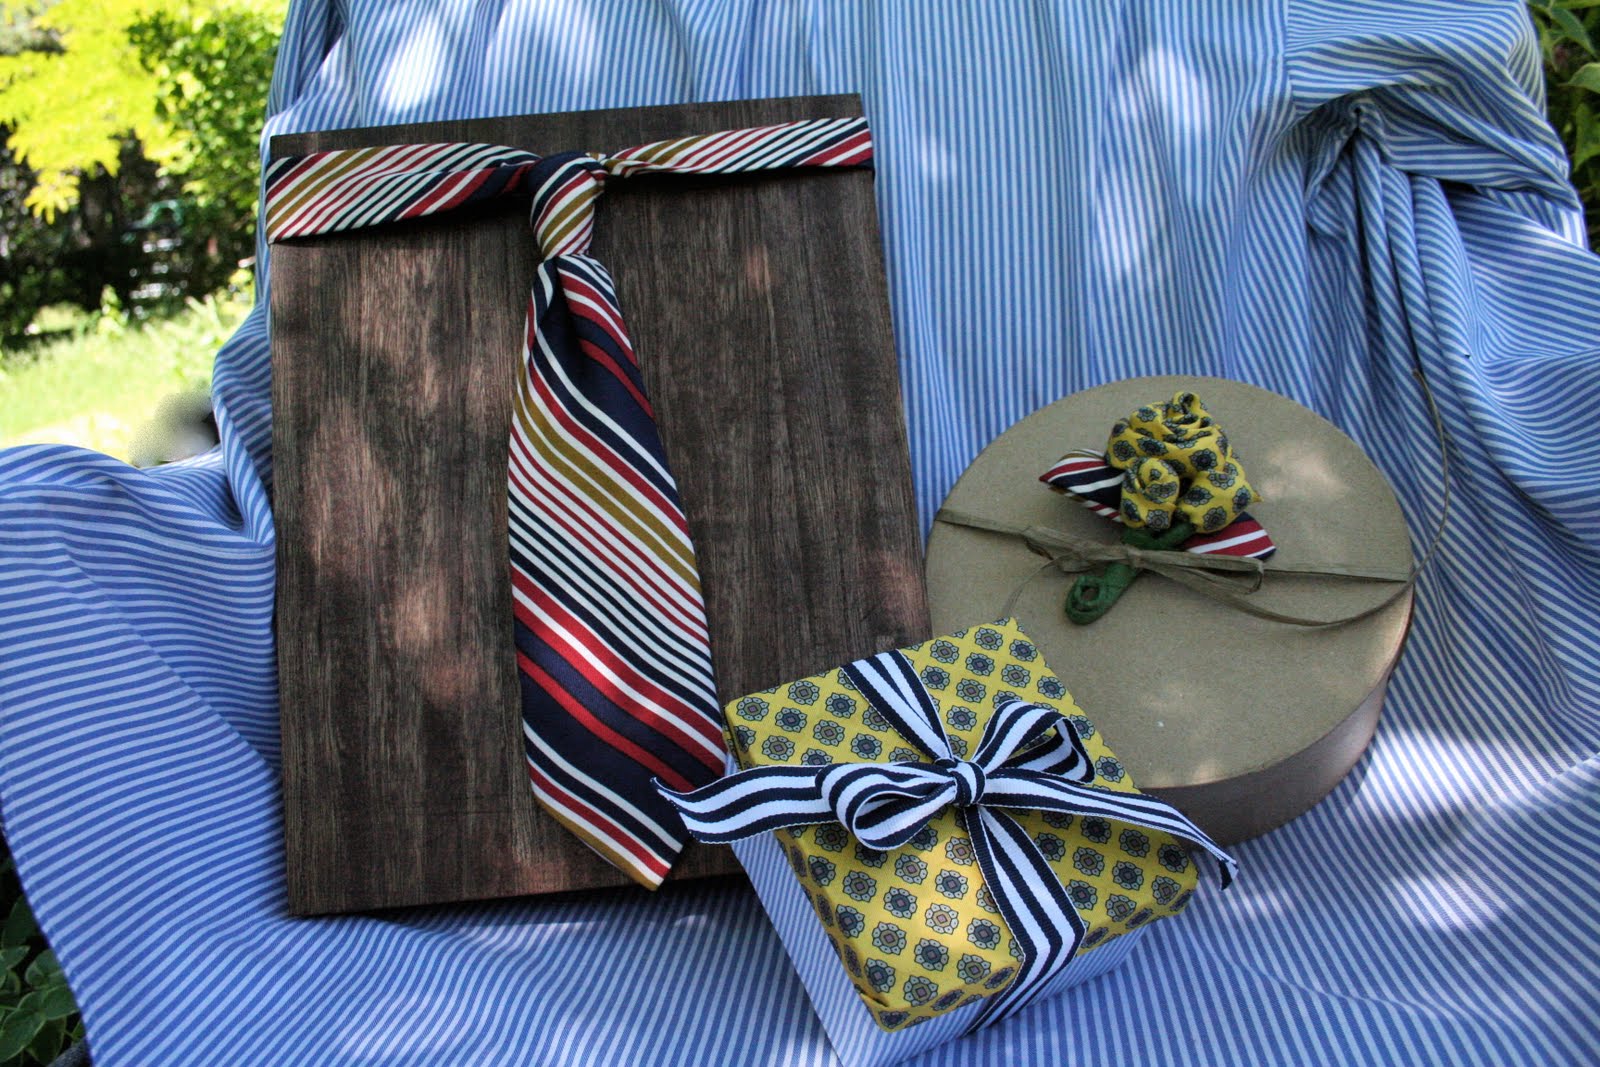

and sadly, i don't have a tutorial for the boutonniere!
it was one of those projects that i did kinda
spur of the moment. if i have enough requests, i will
post a tutorial later.
it was one of those projects that i did kinda
spur of the moment. if i have enough requests, i will
post a tutorial later.


Did you get the wooden box at Lowe's as well? It's so perfect for my office storage! Thanks!
ReplyDeletethe wooded box was purchased at michaels craft store...in the "wood" area, near the dowels and unfinished shelves.
ReplyDeleteThose are adorable !!! What a neat idea.Love it.
ReplyDeletePatti
my favorite is the boutonniere--so pretty and inventive! i also love the stain on that wooden box. i see those everywhere and would've never thought to do that.
ReplyDeletethis is so cool. I loves menswear and think this is just a great idea.
ReplyDeleteIt's a shame I'm only seeing this after Father's day. It's so cute! I think I know how some of my Christmas gifts will get wrapped this year though ...
ReplyDeleteAWESOME tutorial!! Thanks for sharing, just love it!
ReplyDeleteThese are really great! I love them!
ReplyDeleteJust checked back - thank you so much Autumn! I'll check out my local michaels!
ReplyDeleteThank you for sharing! I love your DIY projects! You never cease to inspire me!
ReplyDelete